GtkSharpNodeViewTutorial
The Gtk# docs here are outdated. Please visit the GtkSharp GitHub repo for updated content.
Introduction
The GTK TreeView widget is used to display data in lists and hierarchical trees. Each row in the tree or list can contain multiple columns. The TreeView API can be a little overwhelming, so we’ve provided the NodeView convenience APIs in Gtk# to help simplify its use.
This tutorial is a brief introduction to the NodeView, NodeSelection, and NodeStore APIs with small samples to help get you started. Keep in mind that the NodeView is a work in progress, and doesn’t expose all of the underlying power of the TreeView, but is quite useful for simple List and Tree user interfaces.
Model/View Separation
The NodeView, like TreeView, uses the Model-View-Controller (MVC) design pattern. The NodeStore model stores data to be displayed. The NodeView, which is a thin subclass of TreeView, displays the data. The NodeSelection allows access to the selection state of the NodeView.
Model
The NodeStore implements the Gtk.TreeModel interface to provide both List and Tree data to a NodeView for display. When you create a NodeStore, you specify the node Type which it will contain. The Type must implement the ITreeNode interface. The NodeStore is then populated with instances of this type to expose your data.
The TreeNode class is provided as a helper for exposing the ITreeNode interface. You can simply subclass TreeNode to create your node Type, or implement ITreeNode directly if you want to reuse an existing type to expose your data. The organization of the data within the Node is specified by annotating fields and properties with the TreeNodeValue attribute.
View
The View is made up of three different elements - NodeView, TreeViewColumn, and CellRenderer.
The NodeView widget is a thin subclass of TreeView, so most of the layout description is done via the underlying TreeView API.
Each TreeViewColumn contains at least one CellRenderer. Cell renderers are what actually display the data - items in the model are bound to cell renderer attributes.
The following cell renderers are available:
- CellRendererText - Used to display text
- CellRendererPixbuf - Used to display images
- CellRendererProgress - Used to display a progress bar
- CellRendererCombo - Used to display a drop-down box
- CellRendererToggle - Used to display a check box
CellRenderers are separate from TreeViewColumns for added flexibility, allowing you to have an extremely fine-tuned treeview tailored to your application. For example you can pack an image and text into the same column, which often makes much more sense than creating a separate column for each.
Your first NodeView
Setting it up
Here is a basic example of how to use the NodeView and all its related components. In our example, we will show a simple list of song titles and artist names. The first step is defining our node type, which we do by subclassing the TreeNode helper class:
        [Gtk.TreeNode (ListOnly=true)]
        public class MyTreeNode : Gtk.TreeNode {

                string song_title;

                public MyTreeNode (string artist, string song_title)
                {
                        Artist = artist;
                        this.song_title = song_title;
                }

                [Gtk.TreeNodeValue (Column=0)]
                public string Artist;

                [Gtk.TreeNodeValue (Column=1)]
                public string SongTitle {get { return song_title; } }
        }
TreeNode takes care of all the ITreeNode interface magic for us, so all we have to do is identify which fields and properties represent model column information and which column index they represent. Only fields and properties can be annotated with the TreeNodeValue attribute.
In the above code we expose the Artist field as column 0 of the model, and the SongTitle property as column 1. We will later bind these columns by this index to a specific renderer in the NodeView.
Note also that we Added a TreeNode attribute to the class declaration to specify the data is a flat list as opposed to a hierarchical tree with children on the root nodes. If you are creating a hierarchical tree, the TreeNode attribute is not necessary.
The next step is to create our Application window:
        public class NodeViewExample : Gtk.Window {

                public NodeViewExample () : base ("NodeView")
                {
                        SetSizeRequest (200,150);

                        // Create our TreeView and add it as our child widget
                        Gtk.NodeView view = new Gtk.NodeView (Store);
                        Add (view);

                        // Create a column with title Artist and bind its renderer to model column 0
                        view.AppendColumn ("Artist", new Gtk.CellRendererText (), "text", 0);

                        // Create a column with title 'Song Title' and bind its renderer to model column 1
                        view.AppendColumn ("Song Title", new Gtk.CellRendererText (), "text", 1);
                        view.ShowAll ();
                }

                protected override bool OnDeleteEvent (Gdk.Event ev)
                {
                        Gtk.Application.Quit ();
                        return true;
                }
We derive a Gtk.Window subclass and override its OnDeleteEvent handler to shutdown the application gracefully on a window manager close event. The constructor creates a NodeView using a Store property that will be defined in the next code snippet. The view is added as the window’s child and we append a couple of TreeViewColumns to the view. The columns each have a single CellRendererText renderer with its text attribute bound to the model column indexes exposed by MyTreeNode. Then we do a ShowAll on the view to make it visible when the window is shown.
The Store property is defined as follows:
                Gtk.NodeStore store;
                Gtk.NodeStore Store {
                        get {
                                if (store == null) {
                                        store = new Gtk.NodeStore (typeof (MyTreeNode));
                                        store.AddNode (new MyTreeNode ("The Beatles", "Yesterday"));
                                        store.AddNode (new MyTreeNode ("Peter Gabriel", "In Your Eyes"));
                                        store.AddNode (new MyTreeNode ("Rush", "Fly By Night"));
                                }
                                return store;
                        }
                }
If we haven’t already built it, we create a NodeStore which will contain MyTreeNodes. Then we instantiate a few MyTreeNodes and add them to the store. All that’s left is a Main method, which is pretty standard for any Gtk# program:
                public static void Main ()
                {
                        Gtk.Application.Init ();
                        NodeViewExample win = new NodeViewExample ();
                        win.Show ();
                        Gtk.Application.Run ();
                }
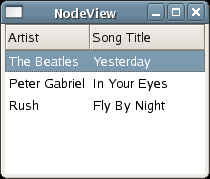
The whole sample named “Simple NodeView” can be found [http:/GtkSharpNodeViewTutorialExamples here] and when compiled and executed it looks like this:
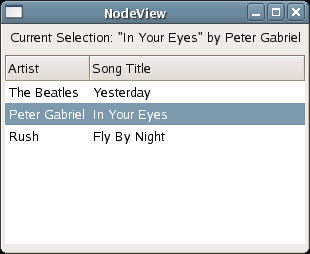
Getting Interactive
This sample demonstrates the use of NodeSelection to react to changes in the selection state of the NodeView. We’ll build on the source of the previous example by adding a Label field to display information about the currently selected node in the NodeView.
To monitor the selection state of the NodeView, we connect an event handler to the NodeSelection’s Changed event:
view.NodeSelection.Changed += new System.EventHandler (OnSelectionChanged);
The event handler grabs the currently selected node and updates the new label widget accordingly:
                void OnSelectionChanged (object o, System.EventArgs args)
                {
                        Gtk.NodeSelection selection = (Gtk.NodeSelection) o;
                        MyTreeNode node = (MyTreeNode) selection.SelectedNode;
                        label.Text = "Current Selection: \"" + node.SongTitle + "\" by " + node.Artist;
                }
Note that all the complexity of TreeIters and GValues is removed and you can access your data in a nice object-oriented fashion. The NodeSelection API exposes ITreeNodes which can be cast to get directly at the data.
The complete source for this sample, Interactive NodeView, can be found [http:/GtkSharpNodeViewTutorialExamples here] and when compiled and executed, it produces the following application: