This page is likely outdated (last edited on 07 Aug 2009). Visit the new documentation for updated content.
MonoTouch Tutorial MonoDevelop HelloWorld
In this tutorial part of the MonoTouch Tutorials we write a very simple application using MonoDevelop MonoTouch Edition for OSX and Interface Builder.
Table of contents |
Basics of MonoDevelop and Interface Builder
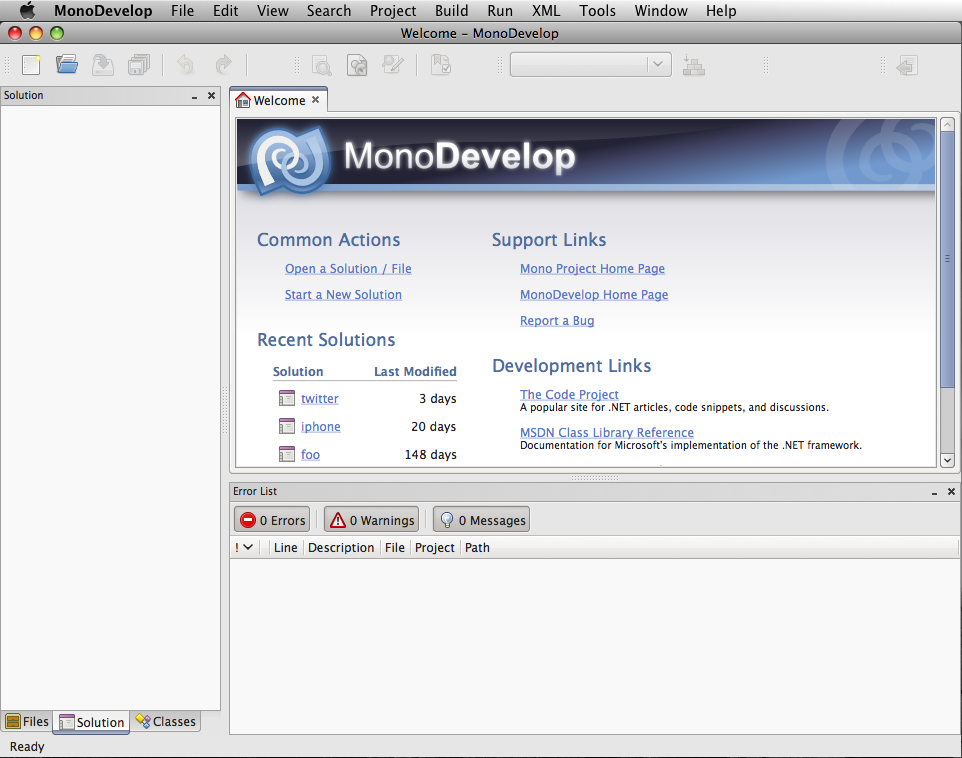
Once you start MonoDevelop, you should be greeted with its startup screen, which looks like this:
The first step is to create a solution for your project. Your solution will contain your main application. You can later add other components to your solution like libraries that you develop, unit tests, and the web site for your application.
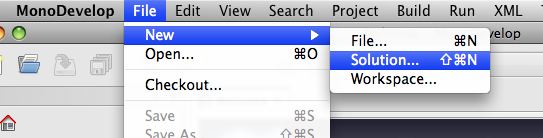
To create the solution, either press Shift-Command-N or select File/New/Solution from the menu:
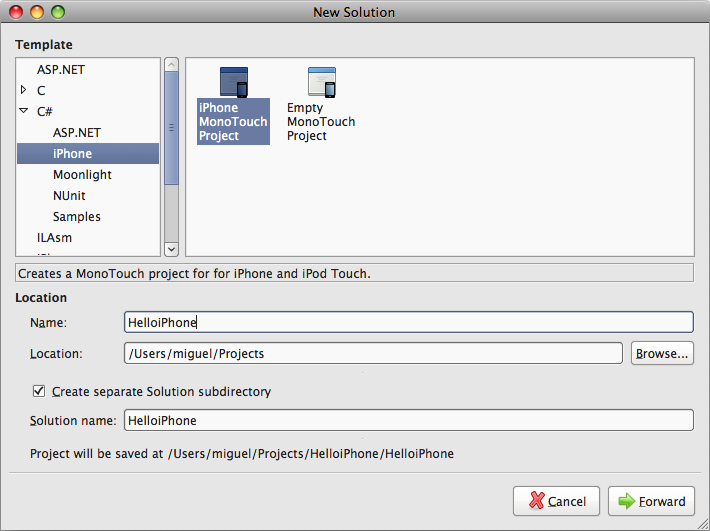
In the solution dialog box, select in the C# category, iPhone projects, and then select “iPhone MonoTouch Project”. Give a name to your project and select Forward to complete your solution setup:
Once your solution is created, you will see on the left side of your screen your solution pad. If the Solution pad is not visible, select View/Solution from the menubar. Expand the solution and the project to see what your project has:
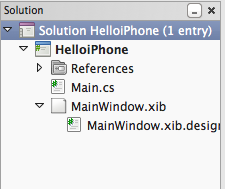
There are a number of important pieces in this list that are worth enumerating.
The default template for MonoTouch applications provides a Main.cs file that contains your main program, it contains your Main () method that starts your application and starts the application event loop.
As a practice, you should transfer control to UIApplication.Main() as soon as you startup. This method will load your user interface from MainWindow.xib, create an instance of the AppDelegate class and start processing events.
The AppDelegate class in the default template inherits from the MonoTouch.UIApplicationDelegate class and contains several methods that you can override to respond to operating system events. In the default template we merely override the FinishedLaunching method, the method that is called when the startup procedure has completed.
In the solution pane, you will see that below the MainWindow.xib file, MonoDevelop has created a C# file called MainWindow.xib.designer.cs. This file is automatically updated every time that you make changes to the XIB file and it mirrors all of the views, controllers, outlets and actions that you add to your user interface and maps those to C# properties that you can access from your program.
If you run the application right now, it will not do anything interesting. A blank screen will show up in your iPhone simulator. We are going to create a very basic user interface with a button that you can touch, and a label that will update its contents every time you tap on the button.
Using Interface Builder with MonoTouch
Launch Interface Builder by double-clicking on the MainWindow.xib file. Once Interface Builder starts up, you should see a surface (your window) and a Library that contains various components. Your Library should look like the following screenshot. If it is not there, select Library from the Tools menu:
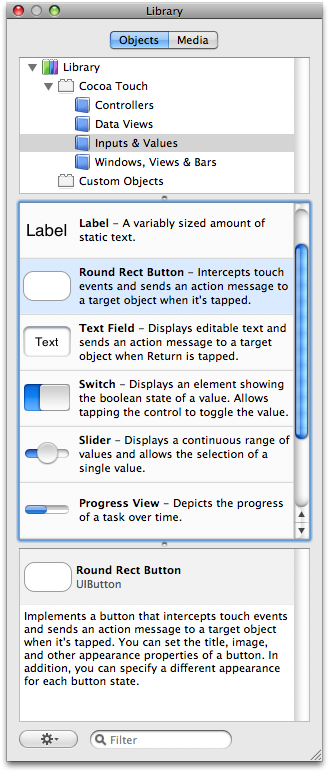
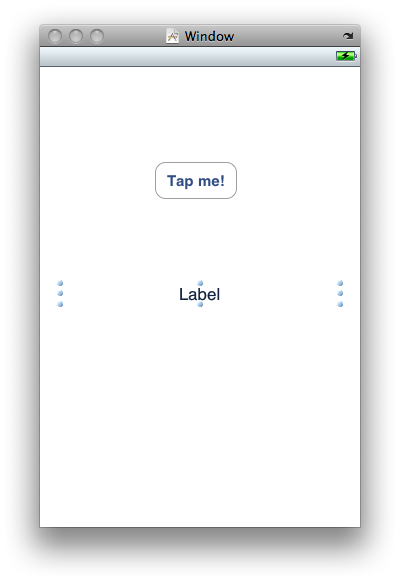
Select the “Inputs and Values” as shown on the screenshot and drag both a “Round Rect Button” into the surface and a Label into it. Double click on the button to change the text to say “Tap me!” and make sure that the label stretches and is centered. Alignment can be configured in the “Attributes Inspector” (also in the Tools menu).
The result should look more or less like this:
Unlike Windows.Forms, Gtk# or ASP.NET where objects dragged into the design surface have an identifier associated that you can refer immediately from your source code, with Interface Builder a different model is used.
To connect components together you need to define outlets in your classes. These outlets at runtime are mapped into C# properties that you can access. In our sample we want to access both the label and the button from our C# code so we will need to define one outlet for each control that we want to access, and then wire up the outlet. We will explain this next.
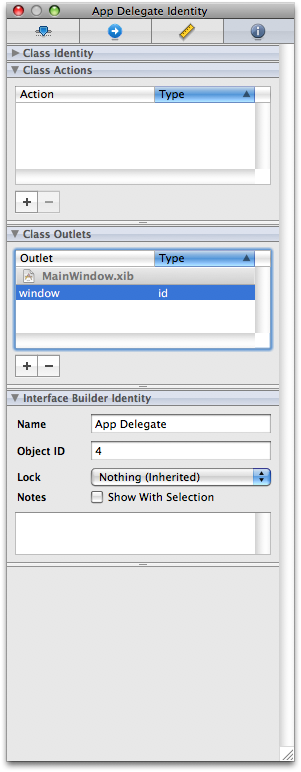
To let the application delegate access the button and the label, we are going to have to connect these controls with it. Select the “App Delegate” in your Document Window. And then in the Identity Inspector you should see something like the screenshot below. If you do not see this, select “Identity Inspector” from the Tools menu:
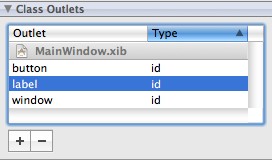
We are going to create two class outlets in the application delegate. Each outlet that we create in the user interface will be reflected as a property in a partial class in the MainWindow.designer.xib.cs file.
Create one for the label, and one for the button by clicking on the [+] button in the “Class Outlet” section of that pane. Once you are done, it should look like this:
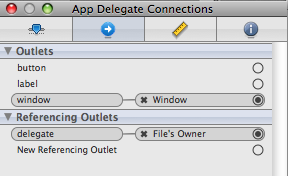
Once these outlets have been defined, you can switch to the “Connections” tab in the Inspector. You will see that the label and button outlets are not wired up to anything yet, it will look like this:
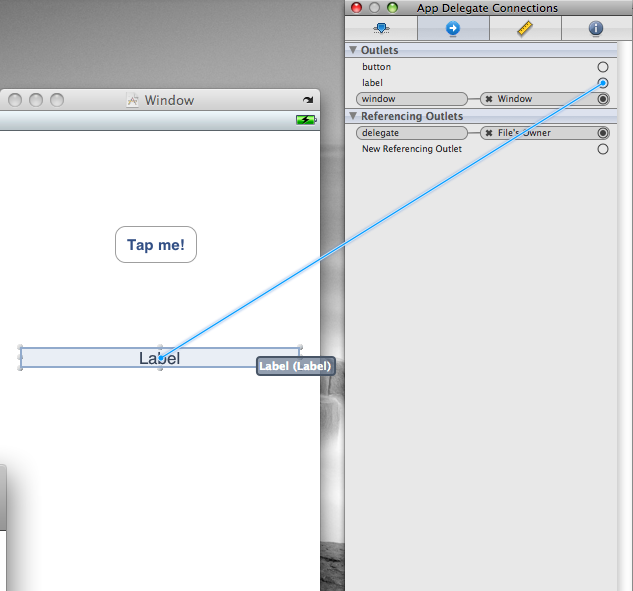
The next step is to connect the label and the button to the controls that we added to our surface before. If you hover over the empty circles and then click and drag, a line will be drawn from this outlet to other components on the screen. First connect the label outlet to the Label control on the designer surface, like this:
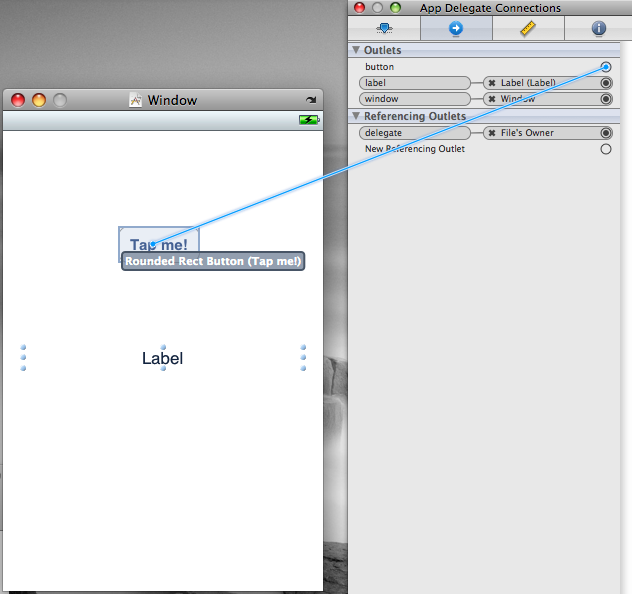
Repeat this process, this time with the button:
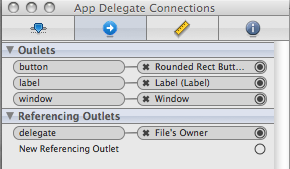
Once you have those two outlets wired up, you should see this:
Save your file by hitting Command-S and switch back to MonoDevelop.
Adding Behavior
For the sake of demystifying what is happening behind the scenes, double click on the MainWindow.designer.xib.cs file you will see that behind the scenes MonoDevelop has generated one property accessor for each outlet:
Md hw iphone18.png
This file is automatically updated every time you modify your XIB file using Interface Builder. Do not make any changes to this file as any changes that you make will be lost the next time you update your XIB file. This is a MonoDevelop generated file, you can completely ignore it while developing.
The properties are stored in a partial class so the compiler will combine your AppDelegate in Main.cs with these autogenerated properties.
Go back to your Main.cs file. We are going to add a little bit of C# code. In the AppDelegate class you can now reference window, label and button as properties of your instance. You can use this to customize the controls or alter their behavior.
Let us attach an event handler for the TouchDown event, an event that is triggered when the user taps on the button. MonoDevelop’s code completion will help you navigate the API as you write code:
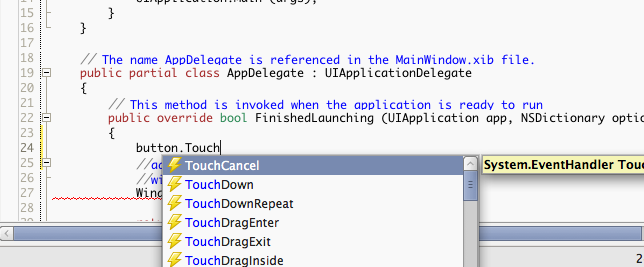
You should write something like this:
int ntaps = 0;

button.TouchDown += delegate {
    label.Text = "I have been tapped " + (++ntaps) + " times";
};
The above uses the C# 3.0 syntax to attach a piece of code to an event handler and shows how to change the contents of the MonoTouch.UILabel that was created. The ntaps variable is captured by the compiler and becomes the closure for the event handler, so every time the user taps on the screen, the variable will be updated accordingly.
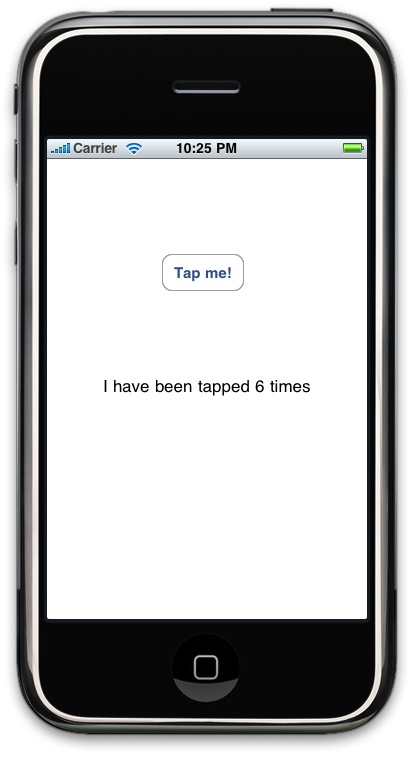
Build your application using Command-B or select Build/Build and then select Run/Run to deploy your software to the iPhone emulator (or press Alt-Command-Return).
You should see this:
Using Actions
The style used in the previous section was the C# 3.0 style and it is suitable for a wide range of applications. The following section is only necessary if you want to use the Objective-C style of hooking up events.
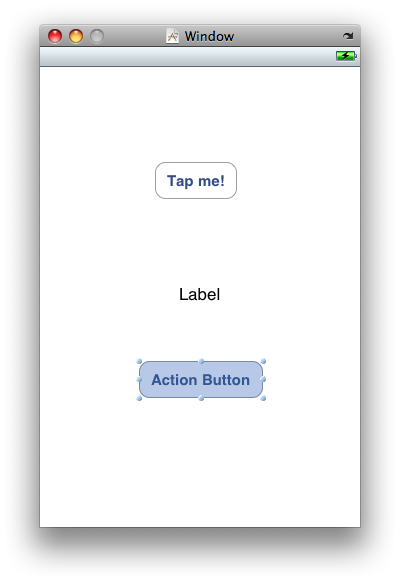
Actions can be defined in Interface Builder in the same tab that we used to define the outlets. As an example of how to use Actions in your code, we are going to add another button to the screen, in my case it looks like this:
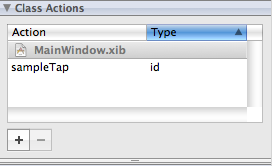
Then select the App Delegate object in your Document Window, and go to the information pane. This time, instead of adding outlets, we are going to add actions. Add an action named “sampleTap”, it should look like this when you are done:
The next step is to make the button event send the message to our AppDelegate, to do this select the new button on the screen and go to the Connections tab. Now connect the “Touch Down” event to the App Delegate:
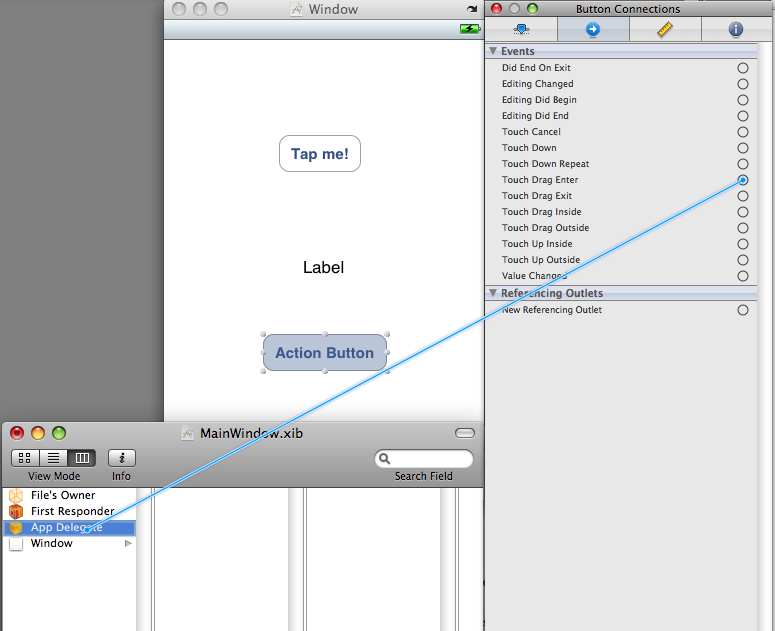
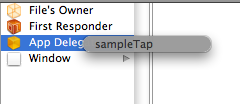
When you select the App Delegate, you will be prompted for the action to invoke in there. In this case it is the “sampleTap” that we defined above. Select it:
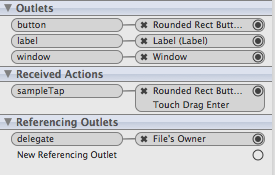
This is now how your outlets and actions should look like for your AppDelegate:
Save your file and go back to MonoDevelop.
When connecting the action to your code, MonoTouch looks for a method decorated with a MonoTouch.Foundation.Export attribute specifying the name of the action. MonoDevelop automatically generates a partial method in the CodeBehind designer class with this attribute applied, for example for sampleTap:
[MonoTouch.Foundation.Export ("sampleTap:")]
partial void sampleTap (MonoTouch.UIKit.UIButton sender);
Then in your your AppDelegate class, MonoDevelop’s code completion can assist in writing the partial method’s implementation:

For example,
partial void sampleTap (UIButton sender)
{
    label.Text = "Second button clicked";
}
However, you are free to ignore the partial method definition and instead write the handler signature and its Export attribute manually. The C# compiler ignores partial methods without implementations.
There is more information on the binding in the responding to events section of the API.
Deploying to the device
MonoDevelop can deploy a MonoTouch application to a correctly provisioned device.
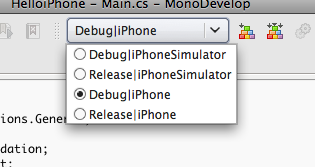
| Switch the solution configuration to one of the device configurations, for example “Debug | iPhone”. |
When you have built your project for the device configuration, the “Upload to Device” command in the “Run” menu will become enabled.
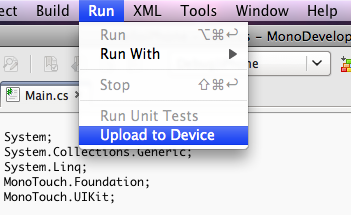
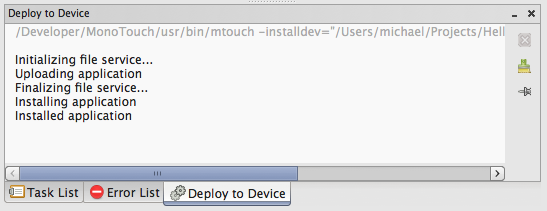
Running this command will then upload the application to the device.
In the project options there are also a number of settings for the app bundle, for example specifying the icon, or a specific code signing key.
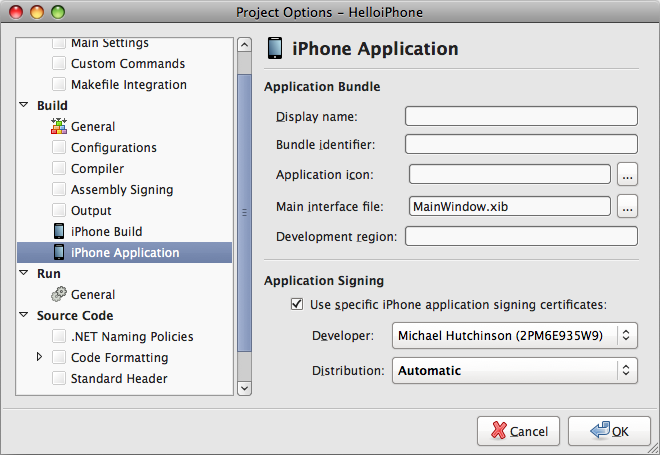
Additionally, if there is an Info.plist file in your project, MonoDevelop will merge the app bundle settings into it without overwriting existing keys. This allows you to use advanced settings that are not exposed by the MonoDevelop GUI.
Resources
Here are some pointers to dig deeper into MonoDevelop and Interface Builder: